
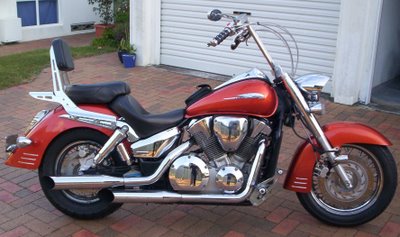
I finally managed to fit the ape hangers on my bike over the weekend. The whole process took me both Saturday and Sunday and involved the removal and replacement of front brake line, accelerator cables, clutch cable as well as cutting and extending the wiring and running them inside the bars. Here is a bit more detail on what I did......
Running Cables
I began with removing the tank as well as everything that I could from the bars - grips, levers and cables - and then fitted my new 14" apes. I wanted to make sure that the bars lined up with the forks and after sitting on the bike and trying them for a while I decided to remove the stock risers and use the risers off a VTX1800 retro which are about 1" lower - this also meant that the top and bottom risers now matched. Once the bars were fitted again, I then started to remove the accelerator cables from the carb - the airbox was removed and then the cables undone. I fitted the new longer cables (+8 inches) and threaded them along the frame, removing the old ones as I went. Adjusted the cables and then re-fitted the airbox. Moved around to the other side and replaced the old, stretched clutch cable with the new one. Clipped it into place and then ran all the new cables beneath the triple tree, through the retainers and let em hang. To get both switch housings to fit on the bars I needed to drill a 10mm hole in the bars on each side for the location pin to sit in - after fitting them and working out the correct location, the holes were marked and drilled and then the housings fitted.
Wiring
Believe it or not, this was the part that I was looking forward to!! I began by removing the rubber covering from the clutch side wiring (which revealed 10 wires) and the from the brake side wiring (which revealed 7 wires). I realised straight away that I was going to have to drill the wiring holes that were pre-drilled in the bars bigger as they were only 7mm - I decided to drill them 12mm so I would have plenty of room. After that was done, I took a drive down to the local hardware store to see if they had any wiring harnesses that I could use - what I did find was a 7 core "trailer cable" which was exactly what I needed. The 7 wires were bound tightly by an outer housing and would fit perfectly through the bars, so I purchased a couple of metres. To be able to use this for the clutch side with 10 wires, I ran 3 additional lengths of wire down the outside of the trailer cable and taped them in place. I threaded the appropriate wiring through the bars on both sides with ease, although the clutch side was a bit tight to get out. I then cut the original bike wiring - two inches from the housing on the bars and a couple of inches below the exit point on the bars - I decided not to thread the original wires through the bars because the trailer cable that I ended up buying was already well protected. The matching of wires and soldering was the longest step in the process (about 4 hours) due mainly to me wanting to check everything twice - luckily I had Kat to help me with this. Once completed, I fitted the housings onto both sides and checked that everything worked and then set about wrapping/heat shrinking the wiring and tidying it all up.
Brakes
I fitted the accelerator cables to the throttle and the clutch cable to the lever - checked that it all worked ok and fastened. Then came the brakes. I was able to stretch the old brake line enough so that I could fit the master cylinder onto the bars. I then covered the bike with rags and removed the old brake line with minimal spillage. I then routed and fitted the new brake line. Now I had never bled brakes before, so I had done a bit of research on the best way to go. In the end I decided to use a piece of clear tubing over the bleed valve with the other end sitting in clean brake fluid - that way an air lock is achieved. I removed the top and seals from the master cylinder, opened the bleed valve and pumped. After about five pumps I stopped and watched as the fluid slowly drained from the master cylinder into the brake line, with air bubbles coming out the end of the clear tube. I topped up the fluid in the master cylinder and pumped again. I repeated this process about four times until no air was coming from the bleed valve and tightened the bleed valve up. The brakes were rock hard - really a very simple process and didn't take long at all. And to think that this was the part I was most worried about!! I re-fitted the tank and seats and sat on her - man, the positioning felt a little different but I could feel relief straight away between my shoulders. My first ride was this morning on the way to work - the position is great, so comfortable and laid back. The clutch was a lot more positive due to the new cable and the brakes were so much easier to use due to the braided line. I love it!

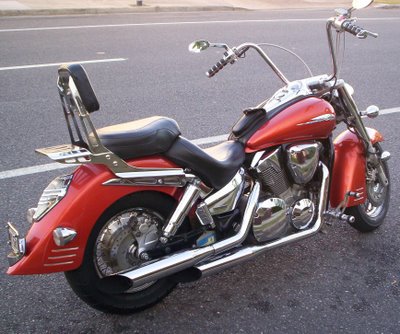


From the pics above it does look as if the brake line is a bit too short - I have since re-routed the brake line to inside the triple tree and now have sufficient length.
I have spent a little more time on it and the more I ride, the more I like!! It is such a comfortable riding position - the bars now push me back a little and my arms are bent, where as with the stock bars I was almost leaning forward with my arms straight out. There is obviously a little more vibration due to both the length and because I did not fit the weights into these bars from the stock bars - but it is not that noticable once you've been riding for a while. It does take a bit of getting used to steering the bike because it is now more sensitive with the increased length but I no longer have to "work" the bike into corners.
All up, the best mod I have done by far because it has made my riding position a lot more comfortable - all I can say is bring on the long rides!!


Running Cables
I began with removing the tank as well as everything that I could from the bars - grips, levers and cables - and then fitted my new 14" apes. I wanted to make sure that the bars lined up with the forks and after sitting on the bike and trying them for a while I decided to remove the stock risers and use the risers off a VTX1800 retro which are about 1" lower - this also meant that the top and bottom risers now matched. Once the bars were fitted again, I then started to remove the accelerator cables from the carb - the airbox was removed and then the cables undone. I fitted the new longer cables (+8 inches) and threaded them along the frame, removing the old ones as I went. Adjusted the cables and then re-fitted the airbox. Moved around to the other side and replaced the old, stretched clutch cable with the new one. Clipped it into place and then ran all the new cables beneath the triple tree, through the retainers and let em hang. To get both switch housings to fit on the bars I needed to drill a 10mm hole in the bars on each side for the location pin to sit in - after fitting them and working out the correct location, the holes were marked and drilled and then the housings fitted.
Wiring
Believe it or not, this was the part that I was looking forward to!! I began by removing the rubber covering from the clutch side wiring (which revealed 10 wires) and the from the brake side wiring (which revealed 7 wires). I realised straight away that I was going to have to drill the wiring holes that were pre-drilled in the bars bigger as they were only 7mm - I decided to drill them 12mm so I would have plenty of room. After that was done, I took a drive down to the local hardware store to see if they had any wiring harnesses that I could use - what I did find was a 7 core "trailer cable" which was exactly what I needed. The 7 wires were bound tightly by an outer housing and would fit perfectly through the bars, so I purchased a couple of metres. To be able to use this for the clutch side with 10 wires, I ran 3 additional lengths of wire down the outside of the trailer cable and taped them in place. I threaded the appropriate wiring through the bars on both sides with ease, although the clutch side was a bit tight to get out. I then cut the original bike wiring - two inches from the housing on the bars and a couple of inches below the exit point on the bars - I decided not to thread the original wires through the bars because the trailer cable that I ended up buying was already well protected. The matching of wires and soldering was the longest step in the process (about 4 hours) due mainly to me wanting to check everything twice - luckily I had Kat to help me with this. Once completed, I fitted the housings onto both sides and checked that everything worked and then set about wrapping/heat shrinking the wiring and tidying it all up.
Brakes
I fitted the accelerator cables to the throttle and the clutch cable to the lever - checked that it all worked ok and fastened. Then came the brakes. I was able to stretch the old brake line enough so that I could fit the master cylinder onto the bars. I then covered the bike with rags and removed the old brake line with minimal spillage. I then routed and fitted the new brake line. Now I had never bled brakes before, so I had done a bit of research on the best way to go. In the end I decided to use a piece of clear tubing over the bleed valve with the other end sitting in clean brake fluid - that way an air lock is achieved. I removed the top and seals from the master cylinder, opened the bleed valve and pumped. After about five pumps I stopped and watched as the fluid slowly drained from the master cylinder into the brake line, with air bubbles coming out the end of the clear tube. I topped up the fluid in the master cylinder and pumped again. I repeated this process about four times until no air was coming from the bleed valve and tightened the bleed valve up. The brakes were rock hard - really a very simple process and didn't take long at all. And to think that this was the part I was most worried about!! I re-fitted the tank and seats and sat on her - man, the positioning felt a little different but I could feel relief straight away between my shoulders. My first ride was this morning on the way to work - the position is great, so comfortable and laid back. The clutch was a lot more positive due to the new cable and the brakes were so much easier to use due to the braided line. I love it!
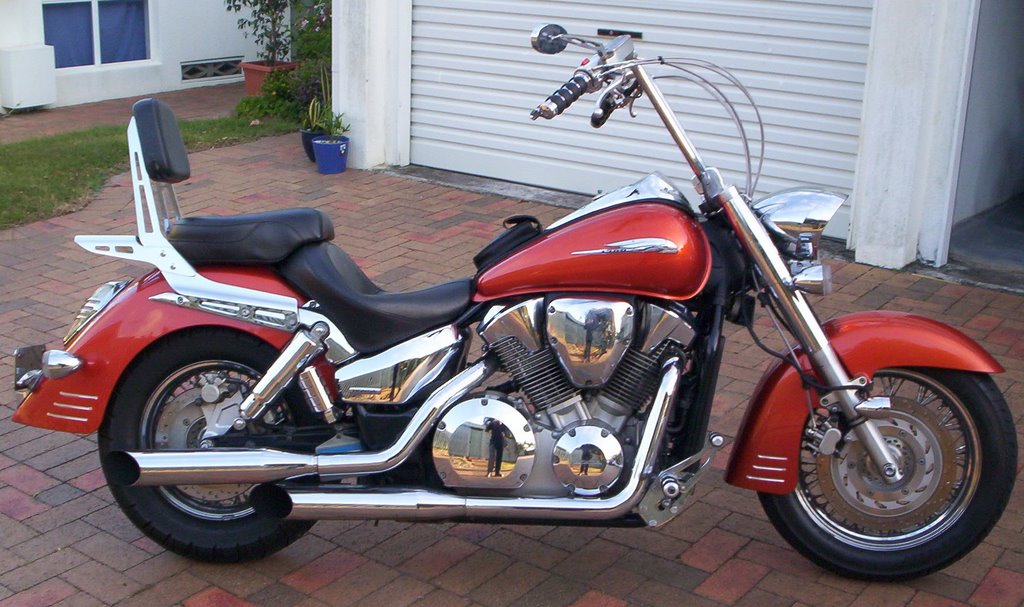


From the pics above it does look as if the brake line is a bit too short - I have since re-routed the brake line to inside the triple tree and now have sufficient length.
I have spent a little more time on it and the more I ride, the more I like!! It is such a comfortable riding position - the bars now push me back a little and my arms are bent, where as with the stock bars I was almost leaning forward with my arms straight out. There is obviously a little more vibration due to both the length and because I did not fit the weights into these bars from the stock bars - but it is not that noticable once you've been riding for a while. It does take a bit of getting used to steering the bike because it is now more sensitive with the increased length but I no longer have to "work" the bike into corners.
All up, the best mod I have done by far because it has made my riding position a lot more comfortable - all I can say is bring on the long rides!!


Old & New Riding Position
Thought I would post a pic of both sets of bars to show how much wider the apes are than the stockers. Also thought I would photoshop an old pic and the one above to compare riding positions - I know it's not perfect but you can see the difference.Labels: Mods and Maintenance
posted by Beaker at 7:22 AM
![]()
![]() Return To Top
Return To Top
5 Comments:
Sounds cool, but where are the pics mate? We want to see how it looks.
It looks good! I'm not sure how comfortable it would be over long distances though, but I guess that a personal thing.
Beaker,
Excellent write-up! I've got an '03 Retro myself and I'm still debating about what things I should do to it. I really appreciate your 'Old & New Riding Position' picture. My VTX has a low & wide handlebar right now. I also ride a Harley that has a high & narrow handlebar. Neither one feels right. I'm thinking high & wide might be the answer. When you went with the Apes did you change the width at all? They look wider but it is hard to tell for sure. If so, what do you think?
Rob,
I have posted a pic of both sets of bars that I took while I was changeing them - you can see that the apes are actually wider than the stock bars of the VTX. It does take a bit of getting used to but I reckon they feel better out wide.
Your bike looks great with the new bars. Glad to hear the ride is more comfortable. I have been thinking about adding short risers to my bike. I need the handlebars slightly up and back. Hey, that could be what I ask Santa for, lol.
Christine had gotten short risers and it made a huge difference for her. I sat on her bike and loved the difference they made.
Thanks for the write up. I, too, love the pic of Old & New Riding Position. Pretty cool!!
Post a Comment
<< Home